Important: Client accounts are free of charge! When creating your client account, the only information required for set up is your email address (used by your Advisor when creating your client account) and password creation. The only time you will enter in payment information is when paying invoices and/or activating subscriptions sent to you by your Advisor.
Follow the step-by-step tutorial below, or jump here to watch a quick video walkthrough!
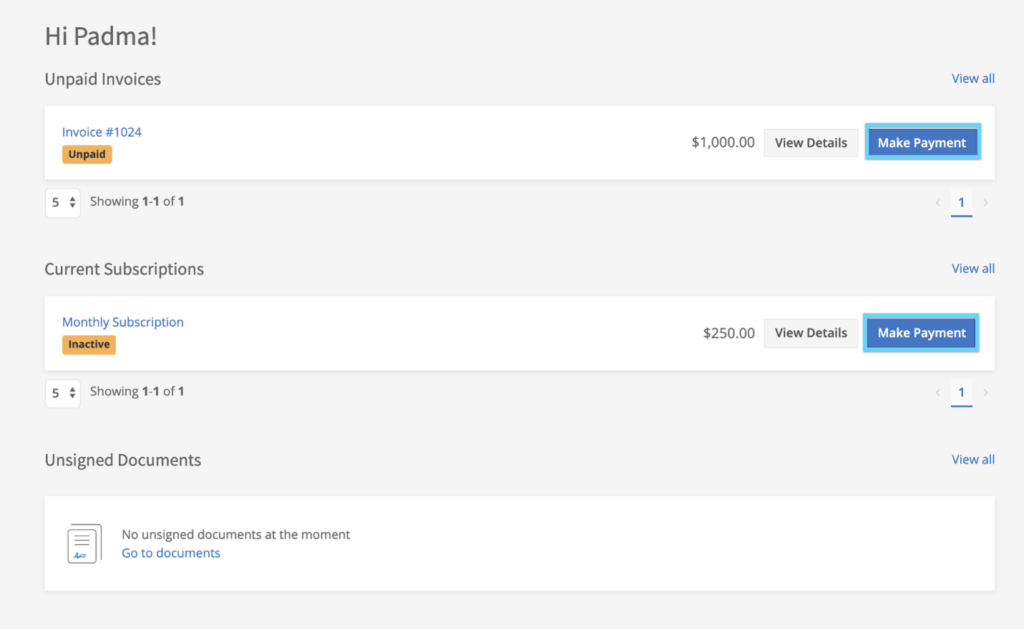
1. Click the blue Make Payment button on the unpaid or inactive invoice you want to pay. (If you don’t see anything listed on your dashboard, this means your advisor has not yet issued you an invoice!)

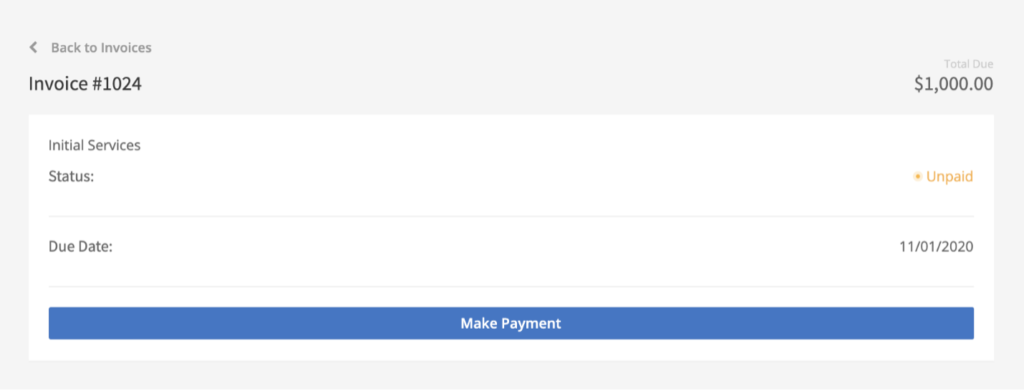
Proceed with clicking the next blue Make Payment button after reviewing the invoice details:

Note: When paying with a mobile device, click the drop down menu next to the invoice or subscription to access the Make Payment button.

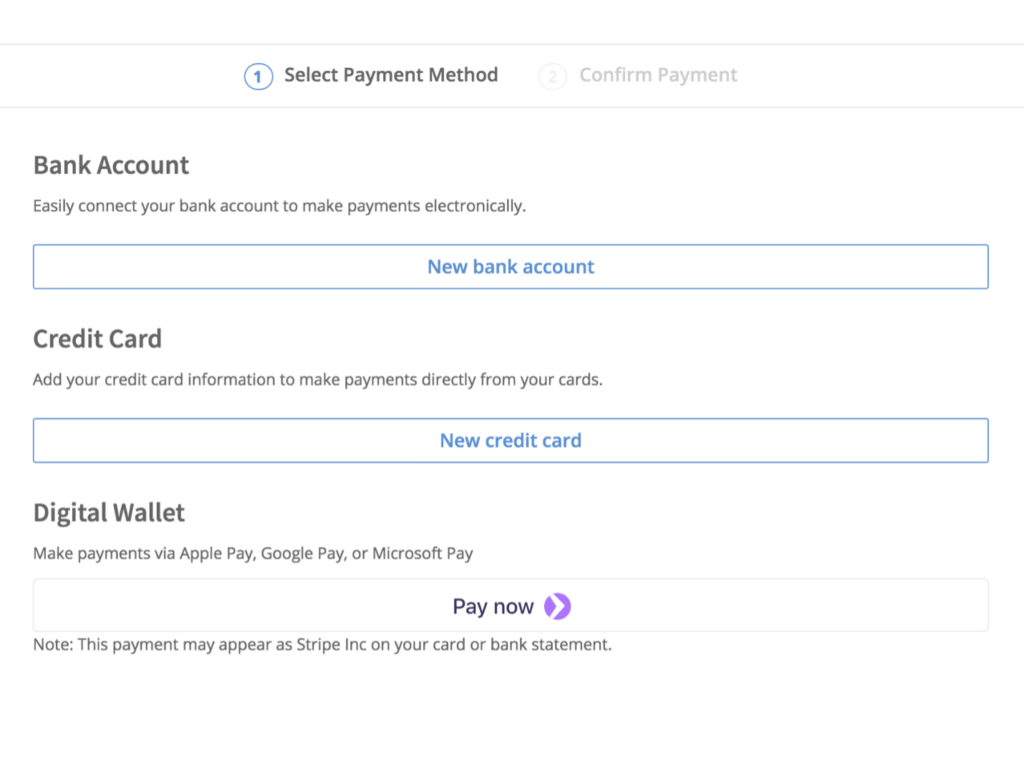
2. Choose a method for adding a bank account or credit card.
Note: If your advisor has chosen to only be paid via ACH (checking account) or only via credit card, you will see only see that method available as an option.

You can use any credit card/debit card on AdvicePay when the credit card option is available to you. We accept Visa, Mastercard, American Express, Discover, JCB Diners Club, and China UnionPay credit and debit cards. We also accept payments made via your digital wallet, like Apple Pay, Google Pay, or Microsoft Pay. All payments are processed by our underlying partner payment gateway, Stripe.
When paying via ACH, we have over 500 banks available for quick automatic linking via our Plaid integration under the ‘Connect’ option. To add your account this way, you’ll need to know your online banking login information. Some banks may ask you to take extra steps to verify your identity and will send you a verification number via text.
Tip: If your bank isn’t listed for quick linking, you forgot your online banking login info, or you’d simply like to add your account a different way, any checking account can be added by selecting ‘Manually enter details’ and entering an account and routing number from a check! ? Please note that we do not accept savings accounts.
3. Once the account you want to use is added and selected, click Next to make a final review of your payment. To go over the full details of your payment, click View details.
Note: If you selected to pay with a credit or debit card via your digital wallet — e.g. Apple Pay or Google Pay — your payment will process immediately and you will not be taken to this final review screen!
For subscriptions with due dates set in the future, note that you will not be charged immediately upon authorizing the invoice — rather, your account will be debited on the date indicated:

4. When you’re ready, click the Confirm & Pay button to submit your payment/authorization. We will not charge your account or activate your subscription until this button is clicked!

Once successfully submitted, you will be redirected to a screen confirming your payment. You will also receive a confirmation via email. 🙂

